Attention here!!!!
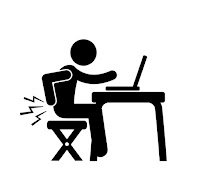
We know most of you are hunched over a computer all day long at work place, office or even if you are working from home amidst this pandemic. And most of you do jobs where you need to stand all day long and its normal for you all to get aches in upper and lower backs. But don't worry we have solution for your pain.
Here we are going to tell you about six stretches that you need to practice everyday to keep away your upper and lower back pain. Performing these stretches on regular basis will give your upper and lower back much needed relief.
But before performing these stretches remember flexibility plays an integral in:
- Strengthening your back muscles.
- Easing and relaxing your back muscles.
- Improves circulation in your spine.
Six important stretches:
- Hanging Stretches (Active and Passive).
- Trunk Rotation Stretch.
- Cat and Camel Stretch.
- Deep Squat and Stretch.
- Hip Flexor Stretch.
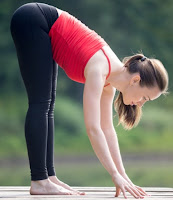
- Jefferson Curl.
- Stand up straight.
- Keep your feet about shoulder width apart.
- Keep your arm's relaxed at your side.
- Now slowly curl your back and lower your head to the ground without bending your legs.
- The Hanging Stretches
- First of all you need a bar to hang (which can carry your body weight).
- Stand up straight ,reach up to the bar and wrap your fingers around to get a good grip.
- Now, one you get a good grip ,take your feet off the ground and just hang.
- It straightens your shoulder.
- Aligns your spine.
- Engages your quads and abs.
- First of all you need a bar to hang (which can carry your body weight).
- Stand up straight ,reach up to the bar and wrap your fingers around to get a good grip.
- Once you got a good grip and you are in hanging position carefully tilt your head back, lift your chest up, your shoulder's back while still keeping your arm's in a straight hanging position.
- Hold it for 5 seconds.
- Aligns your spine.
- Engages your gluts and hamstrings.
- Lie back on the floor with bent knees and feet flat on the ground.
- Keeping the shoulders firmly on the floor, gently roll both bent knees over to one side.
- Hold the position for 5–10 seconds.
- Return to the starting position.
- Gently roll the bent knees over to the opposite side, hold, and then return to the starting position.
- This stretch is great for improving the mobility of your spine.
- It also relaxes your side trunk muscles.
- Get onto the hands and knees with the knees hip-width apart.
- Arch the back, pulling the bellybutton up toward the spine.
- Slowly relax the muscles and allow the abdomen to sag toward the floor.
- Return to the starting position.
- This exercise can help lengthen the back muscles ,make it stronger and ease the tension in the muscles.
- Start in a deep squat position with your butt almost touching the floor.
- Once you are ready, lift your one arm straight up to the ceiling, while the other arm is placed down in front.
- Now once your hand is up in the air, turn slightly in that direction by slightly twisting your torso.
- Hold the position for 5 seconds.
- Repeat the same for the other side.
- Kneel down on a mat.
- Take your one leg bend forward and the other leg bent with knee touching the floor.
- Now lean forward with the leg in front and straighten your other leg flat against the mat behind you.
- Hold this stretch for 10 seconds.
- Do 5 reps.
- Now repeat the same with other leg forward.
- Stand up straight with good posture.
- Now, slowly roll downwards starting with your head then your shoulders and curl your back downwards (one vertebrae at a time).
- After reaching the floor with your hands.
- Hold the position for 5 seconds.
- Now, roll back up slowly upwards until you stand up straight.
- This stretch is great for your flexibility


0 Comments